
Zdoo ManualBook Info
- 1 Introduction
- 1.1 About Zdoo
- 1.2 Zdoo Features
- 1.3 Technical Support
- 1.4 Zdoo License
- 2 Install and Upgrade
- 2.1 ZDOO Installation (for all systems)
- 2.2 One-click Installation Package for Windows (Recommended)
- 2.3 One-click Installation Package for Linux
- 2.4 Upgrade Zdoo
- 2.5 Zdoo Cloud
- 2.6 Remove zdoo from the address
- 2.7 Data Backup
- 2.8 Install Ioncube
- 2.9 Install php-zip
- 3 CRM
- 3.1 CRM Workflow
- 3.2 Add Product
- 3.3 Add Customer
- 3.4 Create Order
- 3.5 Sign Contract
- 3.6 Manage Contact
- 3.7 Manage List
- 3.8 Manage Supplier
- 3.9 CRM Settings
- 3.10 CRM Report
- 4 OA
- 4.1 Todo
- 4.2 Review
- 4.3 Announcement
- 4.4 Attendance
- 4.5 Leave
- 4.6 Makeup
- 4.7 Overtime
- 4.8 Business Trip
- 4.9 Reimbursement
- 4.10 Lieu
- 4.11 Egress
- 4.12 Holiday
- 4.13 Settings
- 5 Cashflow(Cash)
- 5.1 Introduction
- 5.2 Basic Settings
- 5.3 Add Bank Account
- 5.4 Manage Account
- 5.5 Keep Account
- 5.6 Batch keep accounts and import
- 5.7 Reconciliation
- 5.8 Report
- 6 Project (Proj)
- 6.1 Project Workflow
- 6.2 Create Project
- 6.3 Create Task
- 6.4 Actions in a project
- 6.5 Action Views
- 6.6 Actions in a task
- 7 Document(Doc)
- 7.1 Introduction
- 7.2 Create Document Library
- 7.3 Create Document
- 8 TEAM
- 8.1 Introduction
- 8.2 Settings
- 8.3 Modules
- 9 Inventory(PSI)
- 10 Flow
- 10.1 Introduction
- 10.2 Built-in Flows
- 10.3 Features
- 10.4 Examples
- 11 Ameba
- 11.1 Amoeba Management
- 11.2 Start Ameba
- 11.3 Ameba Category
- 11.4 Ameba Department
- 11.5 Expense Distribution Rules
- 11.6 Income Distribution Rules
- 11.7 Ameba Budget
- 11.8 Ameba Trade
- 11.9 Ameba Report
- 12 Administration
- 12.1 Settings
- 12.2 User
- 12.3 Privileges
- 12.4 Apps
- 12.5 Email settings
- 13 Integration
- 13.1 Introduction
- 13.2 Integrate ZenTao
- 14 Customization
- 14.1 Get Ready
- 14.2 Zdoo Directory
- 14.3 Find the Code
- 14.4 Database Structure
Add Customer
- 2016-09-01 09:05:53
- tengfei
- 6933
- Last edited by MCFEY on 2020-05-18 10:20:35
1. Go to "CRM"->"Customer".
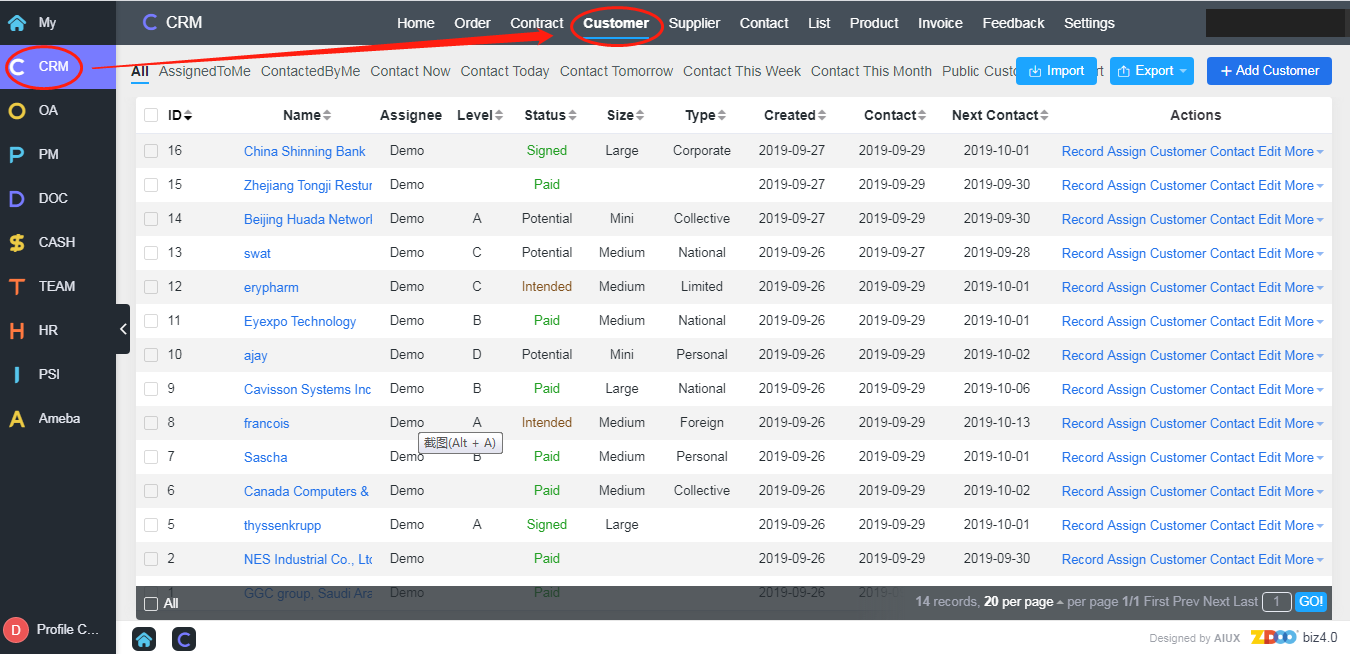
2. Click "Add Customer" at the upper right of the page, then you can see the window shown below.
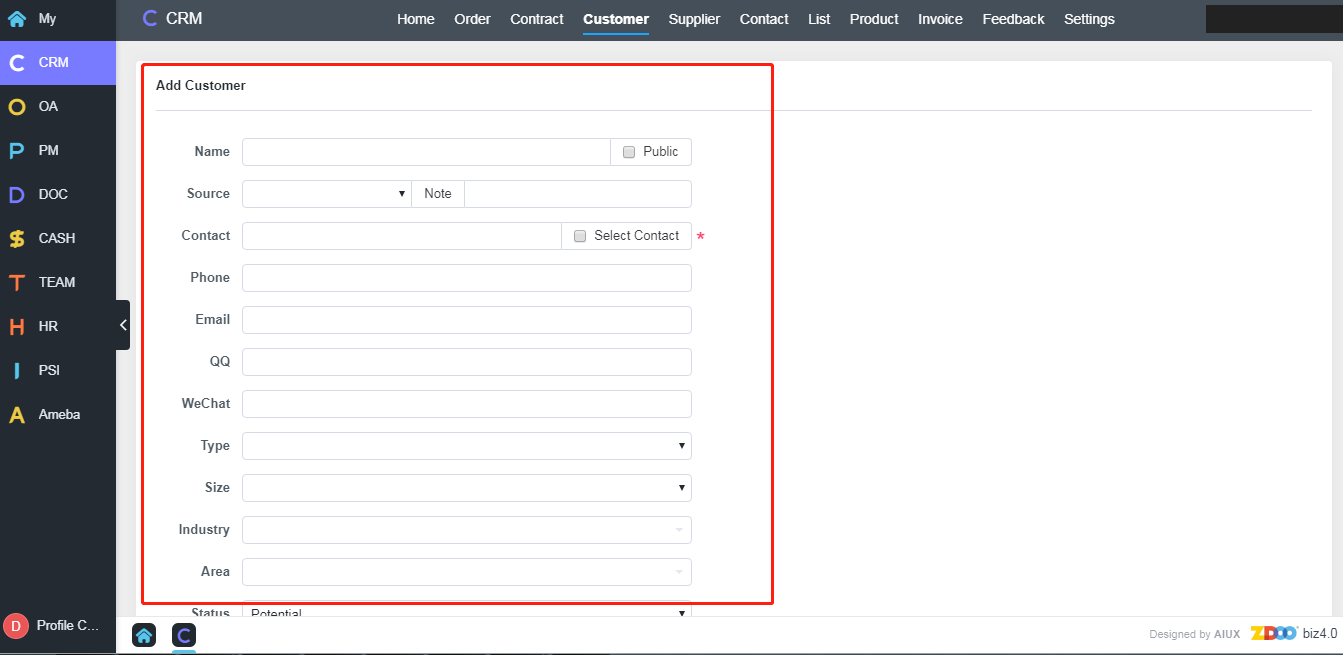
Note
1. You can choose whether you want this customer to be "public" or not. If yes, all salespersons can see this customer.
2. You can also choose the size and the type of a customer to differentiate their importance.
Write a Comment
CUSTOMERS
PRODUCTS
SUPPORT
CONTACT US
- Email: Philip@easycorp.ltd
- Skype: philip517
- Whatsapp: +86 185 6395 3295


