
- 1 Introduction
- 1.1 About Zdoo
- 1.2 Zdoo Features
- 1.3 Technical Support
- 1.4 Zdoo License
- 2 Install and Upgrade
- 2.1 ZDOO Installation (for all systems)
- 2.2 One-click Installation Package for Windows (Recommended)
- 2.3 One-click Installation Package for Linux
- 2.4 Upgrade Zdoo
- 2.5 Zdoo Cloud
- 2.6 Remove zdoo from the address
- 2.7 Data Backup
- 2.8 Install Ioncube
- 2.9 Install php-zip
- 3 CRM
- 3.1 CRM Workflow
- 3.2 Add Product
- 3.3 Add Customer
- 3.4 Create Order
- 3.5 Sign Contract
- 3.6 Manage Contact
- 3.7 Manage List
- 3.8 Manage Supplier
- 3.9 CRM Settings
- 3.10 CRM Report
- 4 OA
- 4.1 Todo
- 4.2 Review
- 4.3 Announcement
- 4.4 Attendance
- 4.5 Leave
- 4.6 Makeup
- 4.7 Overtime
- 4.8 Business Trip
- 4.9 Reimbursement
- 4.10 Lieu
- 4.11 Egress
- 4.12 Holiday
- 4.13 Settings
- 5 Cashflow(Cash)
- 5.1 Introduction
- 5.2 Basic Settings
- 5.3 Add Bank Account
- 5.4 Manage Account
- 5.5 Keep Account
- 5.6 Batch keep accounts and import
- 5.7 Reconciliation
- 5.8 Report
- 6 Project (Proj)
- 6.1 Project Workflow
- 6.2 Create Project
- 6.3 Create Task
- 6.4 Actions in a project
- 6.5 Action Views
- 6.6 Actions in a task
- 7 Document(Doc)
- 7.1 Introduction
- 7.2 Create Document Library
- 7.3 Create Document
- 8 TEAM
- 8.1 Introduction
- 8.2 Settings
- 8.3 Modules
- 9 Inventory(PSI)
- 10 Flow
- 10.1 Introduction
- 10.2 Built-in Flows
- 10.3 Features
- 10.4 Examples
- 11 Ameba
- 11.1 Amoeba Management
- 11.2 Start Ameba
- 11.3 Ameba Category
- 11.4 Ameba Department
- 11.5 Expense Distribution Rules
- 11.6 Income Distribution Rules
- 11.7 Ameba Budget
- 11.8 Ameba Trade
- 11.9 Ameba Report
- 12 Administration
- 12.1 Settings
- 12.2 User
- 12.3 Privileges
- 12.4 Apps
- 12.5 Email settings
- 13 Integration
- 13.1 Introduction
- 13.2 Integrate ZenTao
- 14 Customization
- 14.1 Get Ready
- 14.2 Zdoo Directory
- 14.3 Find the Code
- 14.4 Database Structure
Examples
- 2020-04-03 11:19:55
- Renee
- 3707
- Last edited by MCFEY on 2021-07-01 14:53:38
Flow in Zdoo can be customized and used to design features such as work review, data management, etc.
Zdoo 1.1+ added Flow module.
Zdoo 1.2+ added the data source, custom database, cross-table update, etc.
Zdoo 1.4+ added specification tables, child flows, optimized privilege control, and etc.
Take the flow of internal referral as an example and see how to design a flow in Zdoo.
1. Prepare requirements of the flow
The information that will involve in this flow includes,
- Field: Name, Amount, etc.
- Review: who will review and what is in the review
- Privilege: privileges of all the staff involved in the flow
Internal Referral
Fields: Referrer, Job Position, Name, Age, Gender, Email, Mobile Phone, Resume, Ceritficate, Document.
Job position related fields: Title, Department, Number of user, Job Description, Benefits.
Status: Draft, In Review, Pass Review, Pass Interview, Joined, Rewarded, Rejected.
Status related fields: Status, Reviewer, Interviewer, Onboard Handler, Reward Handler, and all the date and time related.
Workflow: (all staff)Create an internal referal(draft)->(create by) Submit the application(in review)->(HR) Review (pass review)->(interviewer) Interview(pass interview)->(HR) Onboard (joined)->(Dept manager)Reward (rewarded).
Privileges: all staff can check the internal referral they submitted; reviewers can check and review the application that is related to themselves.
The flow mentioned above in Zdoo would look like the screenshot below.
2. Add the flow and its fields according to requirements
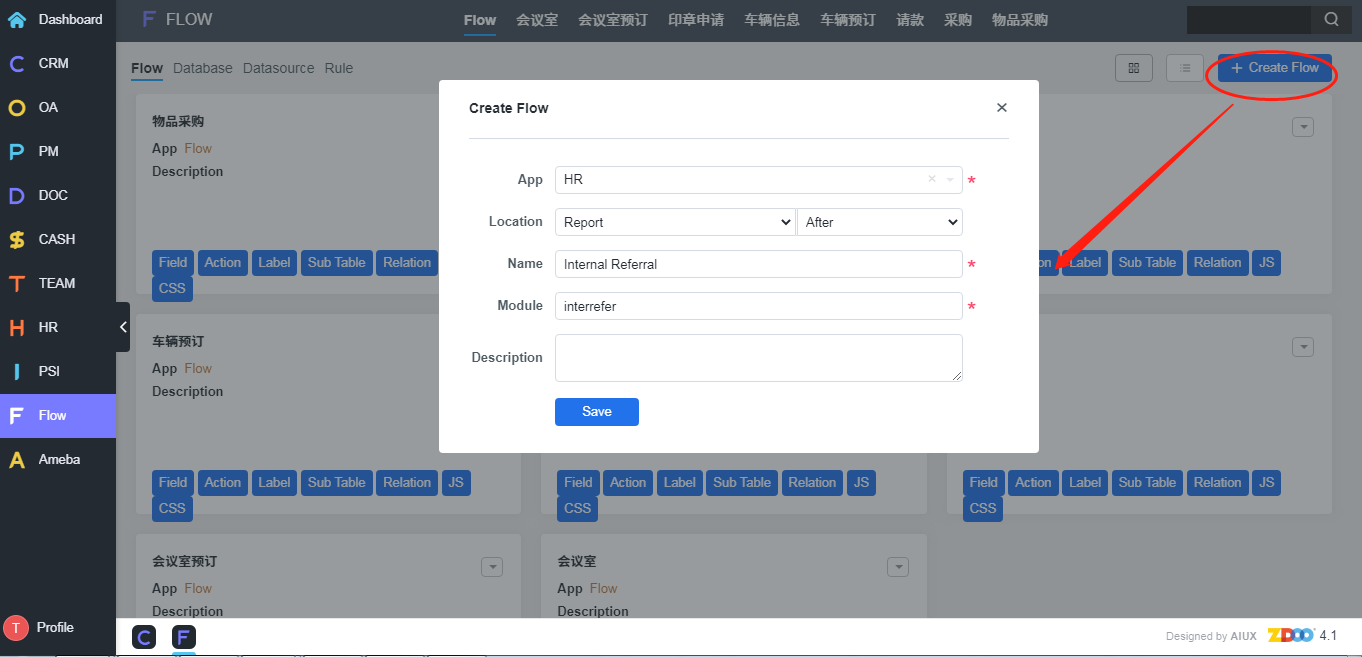
Create the flow and put it to the right application. If there is information that has to be managed separately, create a child flow for it (for example, job position management). If there is any information that can be changed in terms of numbers, create a specification table (for example, resume and certificate).
Create a flow
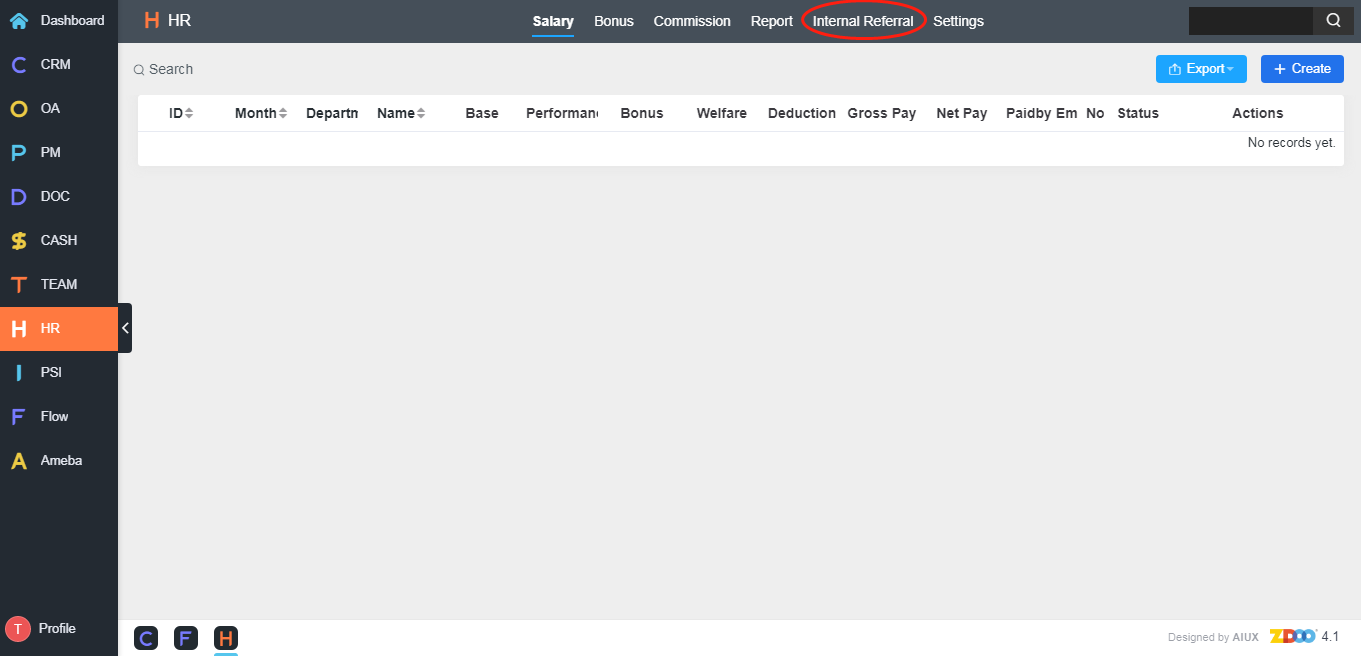
Then you can find the flow added.
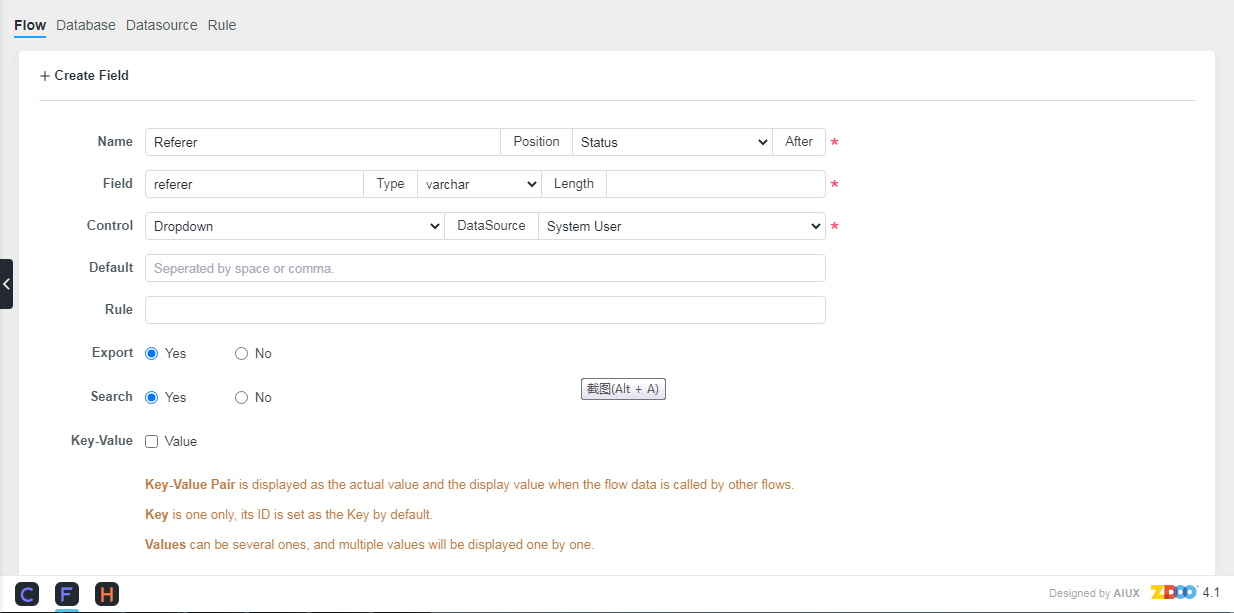
Add a field.
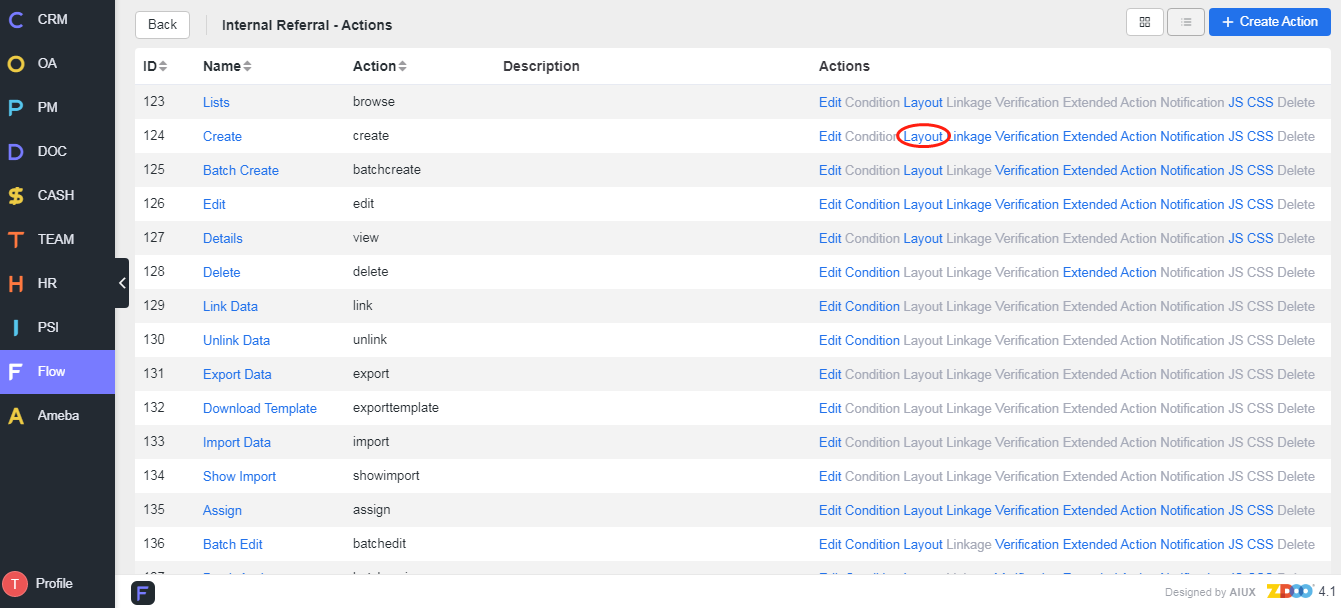
3. Create actions for its status
Each operation is an action in the flow. For example, submit an application, review, reject, etc.
Set the interface when creating a referral.

The current user is the default Referrer.
Add the action to submit an application.
Add the action to review.
4. Add labels according to privileges
Each type of list has a label in the flow. For example, My Application, Wait, etc.
Add a label for My Referral
SCREENSHOT
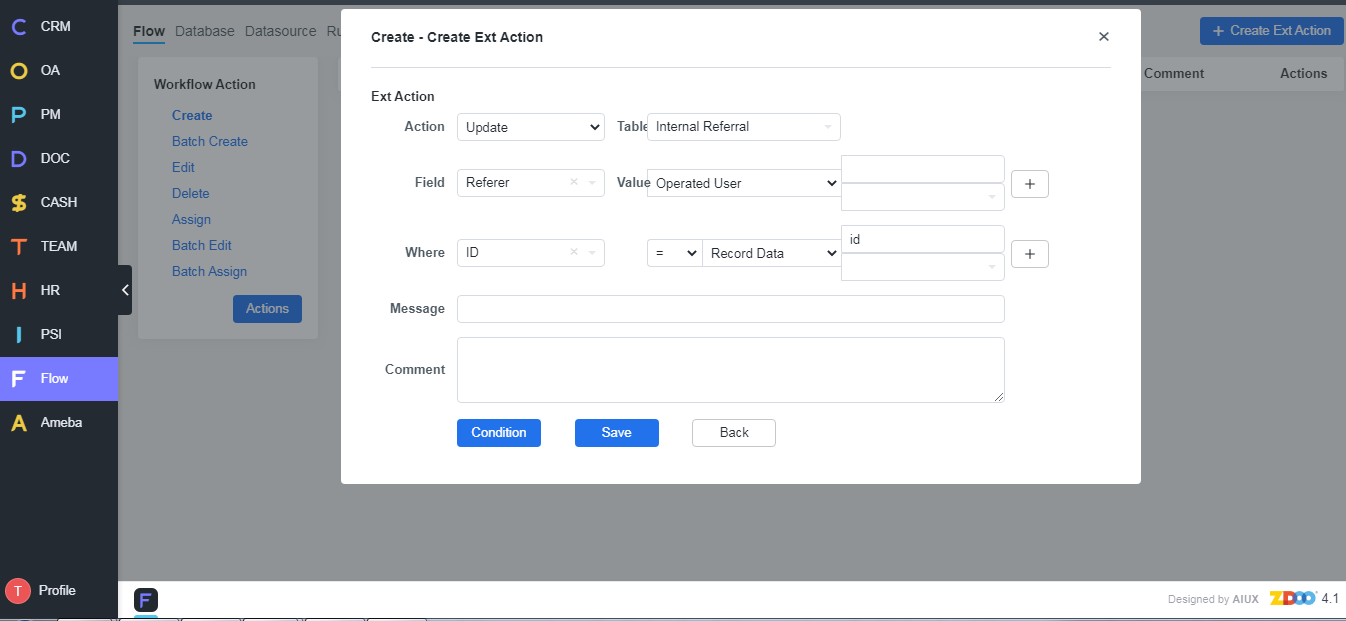
5. Set actions and extended actions(results) according to privileges
When it comes to the status, it is necessary to decide whether to allow the current action and set the mark of the next status. For example, only the draft application can be submitted. After the application is submitted, specify the reviewer of the next reviewer and record the time of the current action.
Set the trigger condition for submitting an application
SCREENSHOT
Set the status of the next action after reviewing
SCREENSHOT
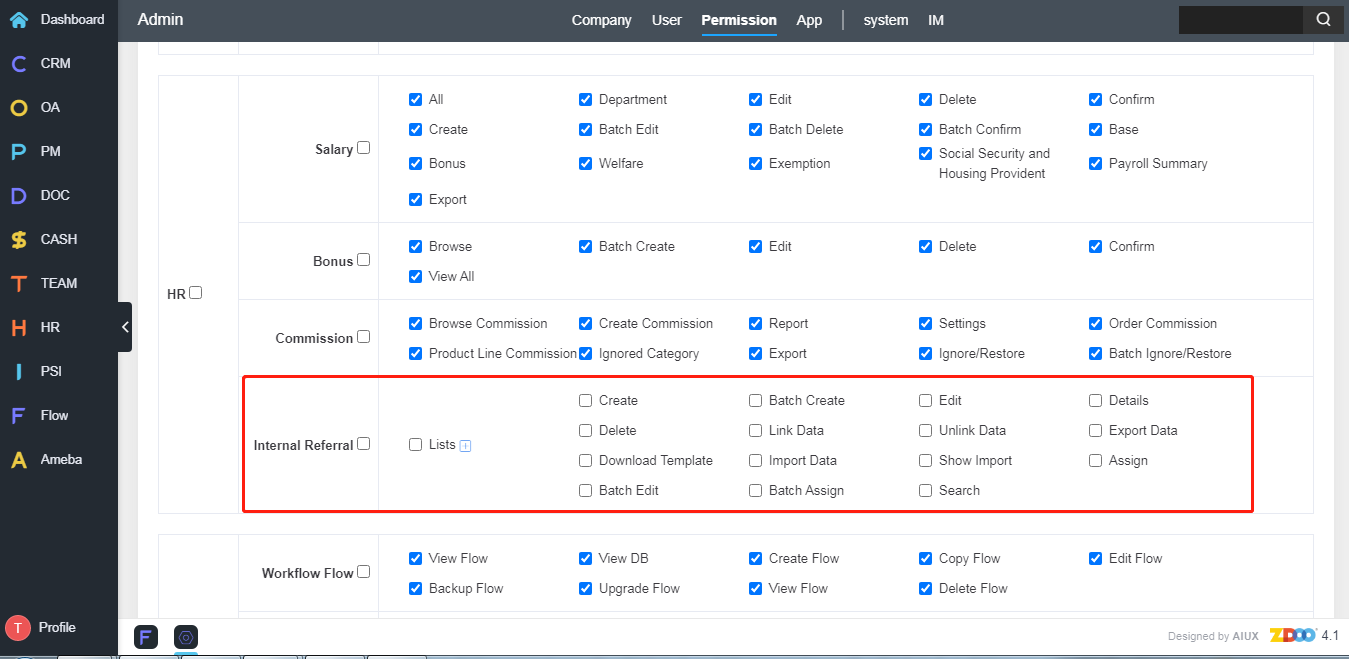
6. Set privileges
Actions and labels can be set in Admin->Privilege.
CUSTOMERS
PRODUCTS
SUPPORT
CONTACT US
- Email: Philip@easycorp.ltd
- Skype: philip517
- Whatsapp: +86 185 6395 3295


